Classic Hot Chocolate

*Regular Hot Chocolate

IMG_4737IMG_4743

A steaming mug of homemade hot chocolate is the perfect accompaniment to a chilly winter day. You can’t go wrong with this classic recipe made with real chocolate and milk and not much else. An addition of whipped cream adds a refreshing touch to the silky rich hot chocolate. This slurp-able drink will be gone in minutes before you know it.

You can enjoy this single serving recipe all to yourself or scale up the recipe to share with family and friends.


Makes: one cup of hot chocolate

Ingredients:

1 cup milk

2 ounces milk or semi-sweet chocolate

½ teaspoon vanilla extract

pinch of salt


Whipped cream

*optional cocoa powder garnish

Directions:

In a saucepan, heat milk to a simmer. Then add chocolate and stir until smooth. Turn off the heat and add vanilla and salt. Pour into a mug, add whipped cream, sprinkle with cocoa powder and enjoy!


Chinese Style Sponge Cake Roll 蛋糕卷

IMG_9832 IMG_9829 IMG_9828

This light and perfectly sweet sponge cake was the highlight of our mom’s birthday. Usually, we are all chocolate lovers, but this cake measured up to our favorite chocolate cake. The whipped cream was the perfect filling-just as light and sweet as the cake itself. Overall, we couldn’t stop cutting off more slices of this cake. It was a real winner! Expect to see variations on this roll cake in the future… maybe even a chocolate version!

Oven Temperature: 400˚F

Baking Time: 15 minutes

Makes: One 15.5×10.5in. roll cake or 8 slices

Ingredients:

Roll Cake
100 grams plain flour or ~3.5 ounces
2 teaspoons corn flour
½ teaspoon baking powder
50 + 100 grams white sugar divided or ~1.8 + ~3.5 ounces
50 ml vegetable oil or ~1 2/3 fluid ounces
8 egg whites
5 egg yolks
3 tablespoons warm water
2 tablespoons milk

Whipped Cream Filling
½ cup heavy cream
2 tablespoons powdered sugar or to taste

Directions:

Preheat your oven to 400˚F or 204˚C or gas mark 6. Line a jelly roll pan (15.5×10.5 inches or 35x30cm) with parchment paper on the bottom and sides (I like to use two pieces: one over the other in a sort of x to go over the sides).

In a medium sized bowl, whisk together the flour, corn flour and baking powder.

Place the egg yolks into a medium sized bowl. With an electric mixer or stand mixer, whisk the yolks, gradually adding in the 50 grams of white sugar, water, milk and oil. Keep blending until the eggs are pale yellow and thickened.

Gradually add in the flour mixture into the egg yolks, blending until it forms a stiffer batter.

In a large bowl that has been washed and dried to remove any traces of fat (same goes for the beater blades), whisk the egg whites on high speed until foamy. Then add in the 100 grams of white sugar gradually until stiff peaks are formed.

Now scoop one dollop of egg whites into the batter. With a spatula, carefully fold the batter with a scooping motion, scraping the bottom and sides of the bowl until combined. Repeat with the remaining egg whites.

Pour the finished cake batter into the pan and level with a spatula. Bake for 15 or so minutes until the top is golden brown. When the roll comes out of the oven, carefully place it on a tea towel with the parchment facing the towel. Then roll it up and let cool until it reaches room temperature.

While the cake is cooling, prepare the whipped cream filling. In a large bowl, whisk the heavy cream using back and forth motions until it reaches soft peaks. Add the powdered sugar and continue whisking until stiff peaks.

When the cake is cooled, unroll it from the towel. Then, spread the whipped cream on top, leaving room around the edges so the filling does not squish out when rolled. Roll the cake back up, place on a serving platter and enjoy!

Savory Carrot and Sweet Corn Pancakes

IMG_9618

IMG_9616 IMG_9605 IMG_9625

Home cooking is looking at what you have available in your fridge and making the most of it. This delightful recipe was the result of such a trip to the fridge. And spying leftover sour cream, fresh carrots and a hunger for pancakes, this recipe was born.

The sour cream seems like a strange addition, but it makes the pancakes tender and moist – my new trick for making the perfect pancakes.


Makes: 12-15 pancakes


Ingredients:

1 1/2 cups flour

2 teaspoons baking powder

1/2 teaspoon salt

1/4 teaspoon black pepper

1/2 teaspoon oregano

1/4 teaspoon garlic powder

2 eggs

1/3 cup oil

2/3 cup milk

8 oz. sour cream

2-3 shredded carrots

1 cup frozen corn kernels (my family usually likes to add more corn because we love the sweetness it gives to the pancakes)


Directions:

In a medium sized bowl, whisk together the flour, baking powder, salt, black pepper, oregano and garlic powder.

In another bowl, whisk the eggs, oil, and milk until well combined.

Pour the egg mixture into the flour mixture and whisk until just moistened – you don’t want to overmix for fear of tough pancakes.

Then stir in the sour cream, shredded carrots and corn.

Put a pan on the stove at medium heat. Drizzle a tablespoon or so of vegetable oil onto the pan. When the pan is hot, add a ladleful of pancake batter and cook until the edges look dry and there are bubbles all over the tops of the pancakes. Flip the pancakes over and cook until both sides are golden brown. Keep cooking the rest of the pancakes and add more oil to the pan as needed. Enjoy!

Mini Red Velvet Cupcakes with Cream Cheese Frosting

IMG_9461

IMG_9459

IMG_9463

IMG_9456

This weekend was highlighted by an amazing concert called the Music Playathon, of which we are honored to have taken part in. Music Playathon is a marathon of student and professional musicians coming together to play an amazing concert. This year’s event lasted seven hours and was an amazing experience. Proceeds from the concert go towards the Music Auxiliary, a local organization that supports music education in our public school system.

The Chen Kitchen along with Joonsoo Kim made an assortment of cupcakes, muffins and bars. Special thanks to Joonsoo for collaborating with us to make this possible. It was super fun and hopefully we can do it again next year. You can also check out a recipe Joonsoo did previously: Frittata.

These mini red velvet cupcakes with cream cheese frosting is one of the desserts we made. These cupcakes are super moist and have the perfect amount of chocolate. A red velvet cake is a hybrid of chocolate and vanilla and these beautiful red cupcakes showcase that well. The rich and creamy cream cheese frosting is literally and figuratively the icing on the cake! This super cute bite-sized cupcake will have you reaching for more!

These cupcakes were a hit and were one of the first ones to disappear at Music Playathon.

This recipe can also be used to make 12 regular cupcakes or doubled to make 8″ two cake layers.

Both recipes are from Laura in the Kitchen.

Mini Red Velvet Cupcakes

Oven Temperature: 350˚F

Baking Time: 9-10 minutes

Makes: 35 mini cupcakes or about 12 regular cupcakes

Ingredients:

1 1/4 cup flour

2 Tbsp cocoa powder

1/2 tsp baking powder

1/2 tsp baking soda

1/4 tsp salt

1/4 cup unsalted butter at room temperature

3/4 cup granulated sugar

1 egg

1 tsp vanilla

3/4 cup buttermilk (or 3/4 Tbsp vinegar with enough milk to reach 3/4 cup)

red food coloring to desired color (we used about 2 tsp liquid food coloring)

Directions:

Preheat oven to 350˚F. Line two mini cupcake pans with paper liners.

In a medium sized bowl, whisk together flour, cocoa powder, baking powder, baking soda and salt. Set aside.

In a stand mixer or bowl with a hand-held mixer, cream together butter and sugar. Add in the egg and vanilla.

Then, add in half of the flour mixture and mix until combined. Slowly add in all the buttermilk and then finish with the remaining half of flour.

Add in red food coloring and mix until homogenous.

Scoop batter 3/4 full into the mini cupcake pans. I used a small cookie scoop to get even cupcakes. Bake for 9-10 minutes or until a toothpick inserted in the center comes out clean.

Cool for a couple minutes in the pans and then transfer to a wire to cool completely before frosting. Enjoy!

Cream Cheese Frosting:

Frosts: 35 mini cupcakes

Ingredients:

4 oz cream cheese, at room temperature

2 Tbsp unsalted butter, at room temperature

½ tsp vanilla

2 cups powdered sugar

1 to 2 Tbsp milk

Directions:

In a medium sized bowl, cream together the cream cheese and unsalted butter until light and fluffy. Add in the vanilla. Then, slowly add in the powdered sugar until combined. Mix in the milk as needed to reach desired consistency.

OPTIONAL: Place frosting in a piping bag with a coupler and no tip. Pipe cupcakes with a swirl.

Enjoy!

Egyptian Baklava

IMG_5314

IMG_5308

IMG_5319

IMG_5309

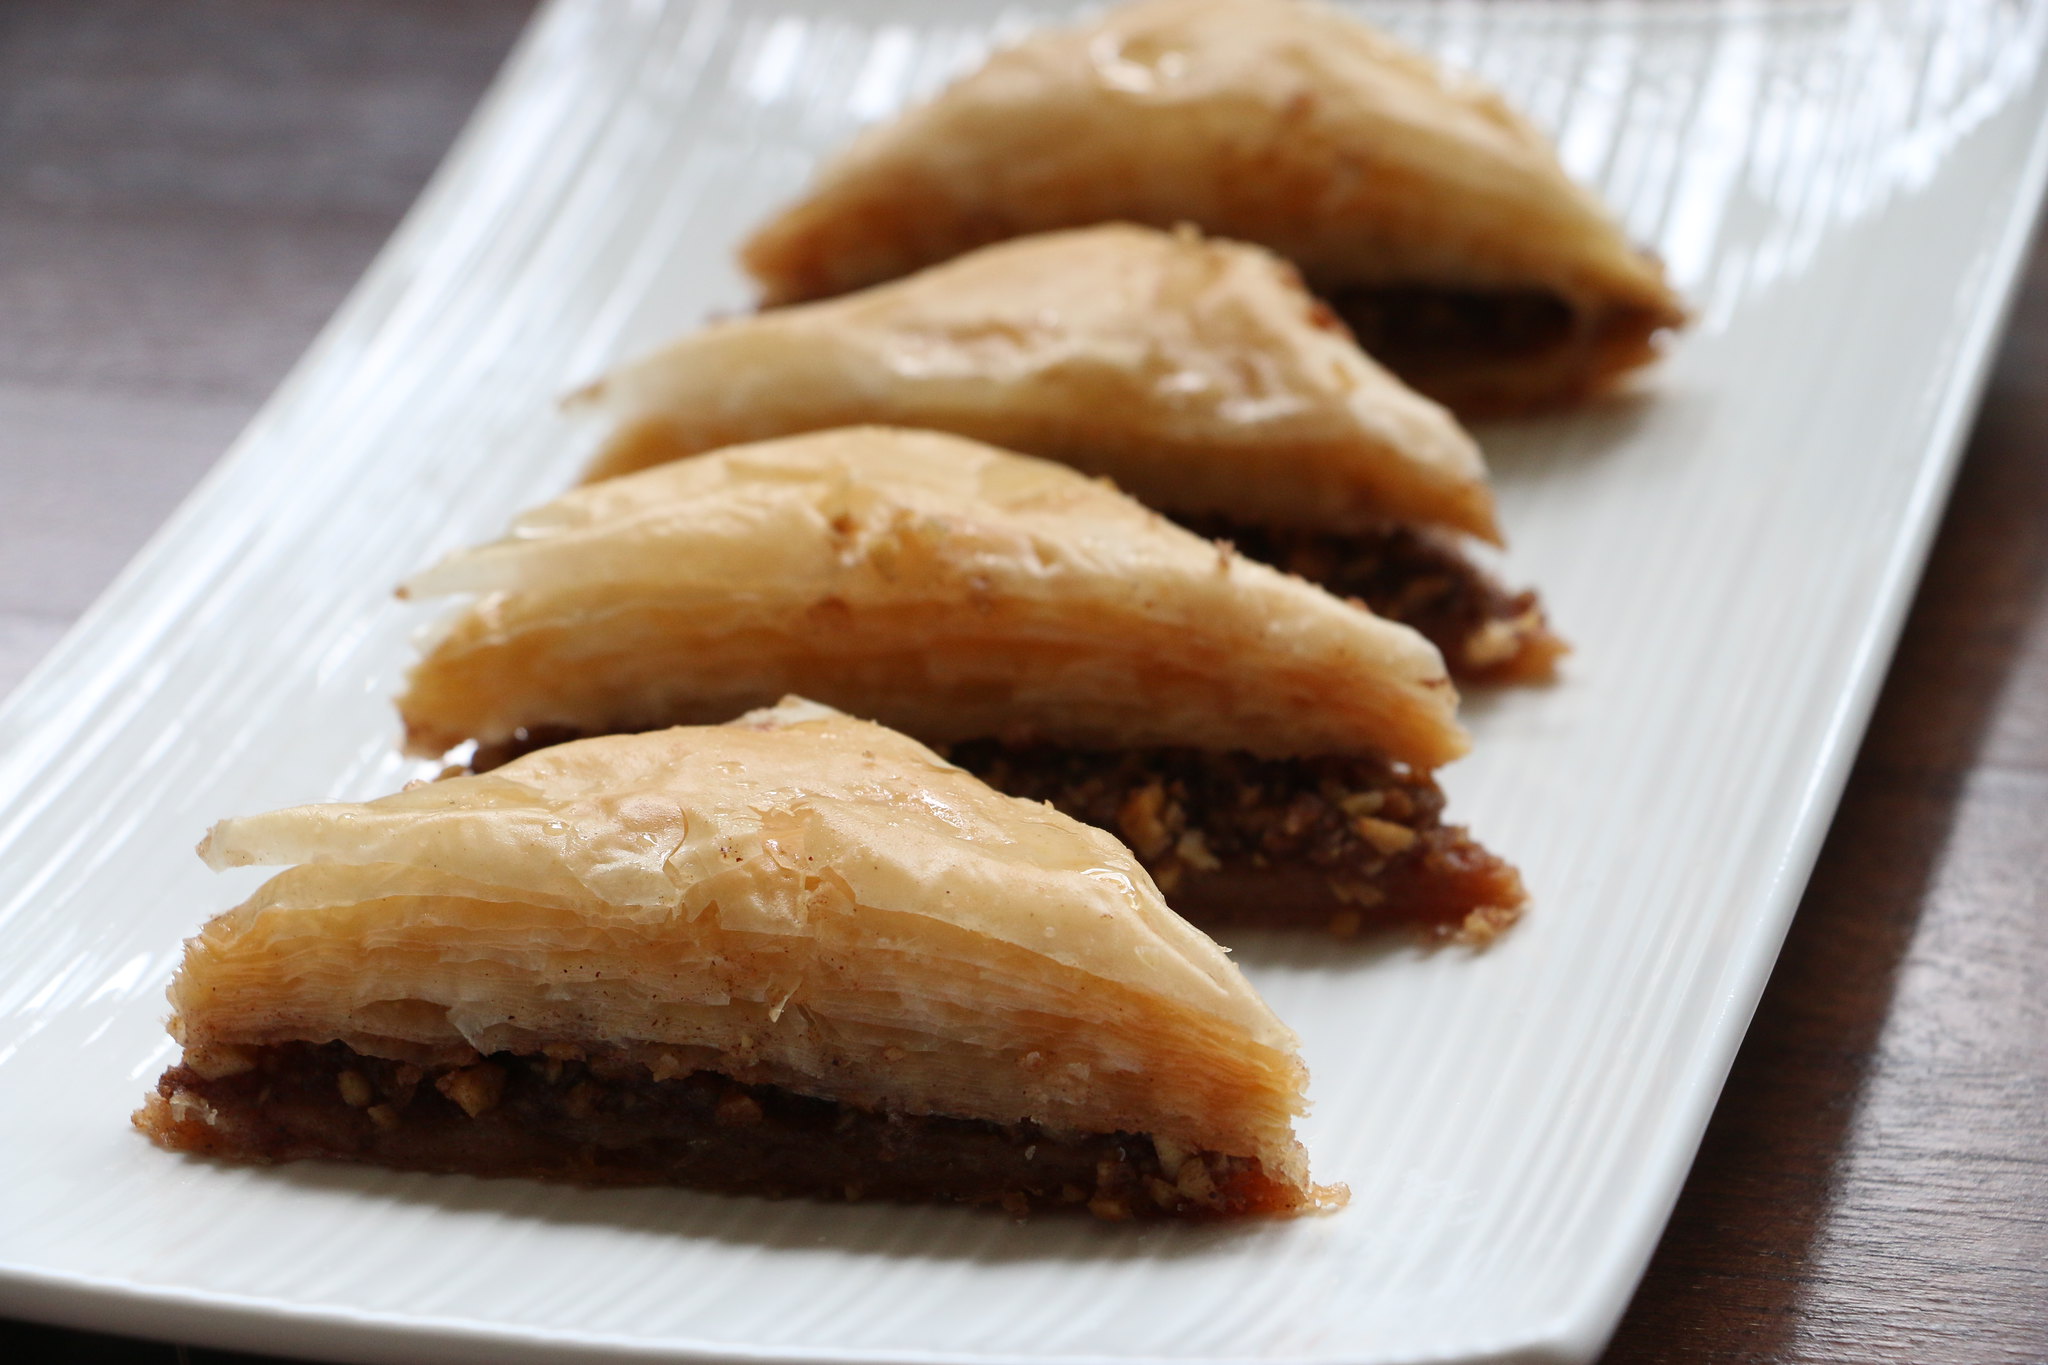
For a (AWESOME) school project, I had to make baklava. Baklava is a traditional Egyptian dessert consisting of many layers of flaky pastry and spiced walnuts, covered in a sweet, orange-blossom-flavored syrup, called a sharbat. The flavors meld together into one sweet treat.

Some of the ingredients include ghee, orange blossom water and phyllo dough — not your typical ingredients.

IMG_5246
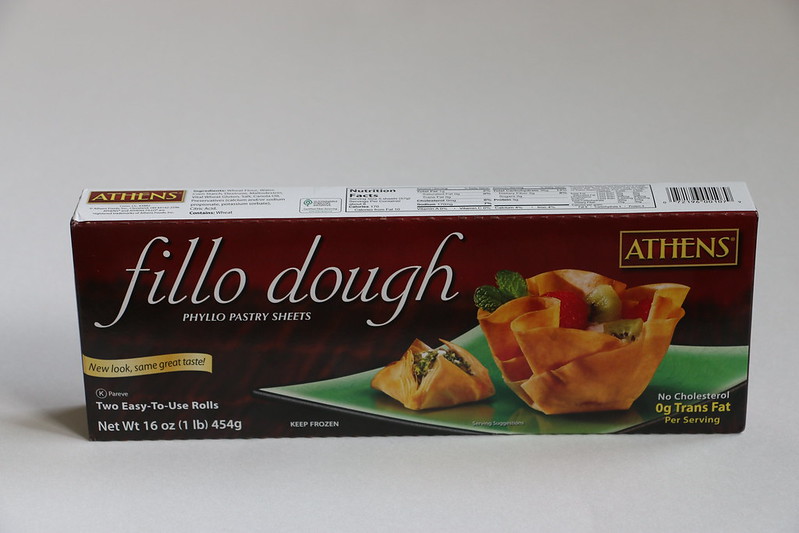
You can find phyllo dough in the frozen foods isle at Walmart. There are two rolls of pastry inside the box. Each sheet of phyllo dough is 9×13 inches. One roll of pastry will be for the bottom half of the baklava and the other roll for the top half.

IMG_5242

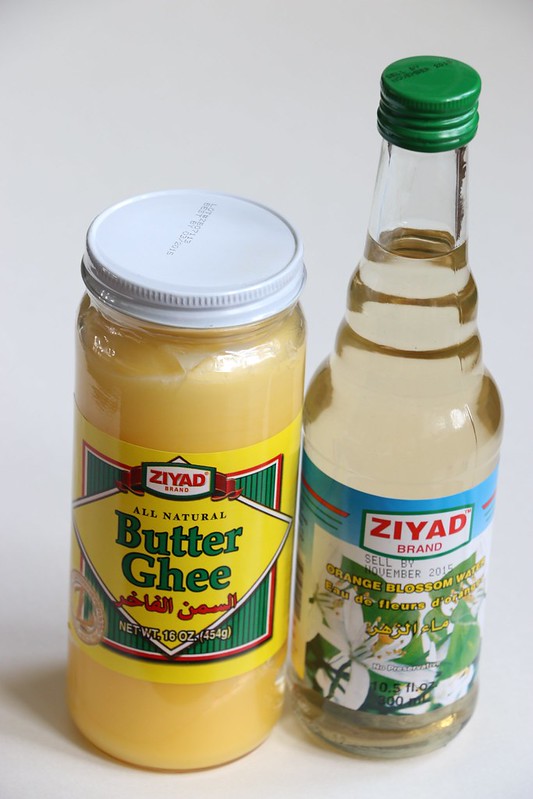
Orange blossom water and ghee can be found at many Asian food stores. If you are lucky, your Walmart may even have these ingredients. If you can’t find ghee, you can replace it with butter. As for orange blossom water, you can omit that, but the flavor will not be the same.
 

Makes: 24 large baklava triangles

Ingredients:
2 cups walnuts, finely chopped
1 cup sugar
2 cups ghee, melted, or as needed
2 tablespoons cinnamon
1 tablespoon orange blossom water
1 package of phyllo dough (one pound), thawed to room temperature

2 cups sugar
1 cup water
2 tablespoons lemon juice
2 tablespoons orange blossom water

Directions:

Preheat oven to 350˚F. Prepare a baking pan by lining with foil. Scatter the walnuts evenly on the pan and bake in the preheated oven for 15 minutes, stirring halfway.


IMG_5249

After the nuts are roasted, turn the oven to 400˚F. Roasting the nuts gives them a golden brown color and intensifies the flavors.


IMG_5250

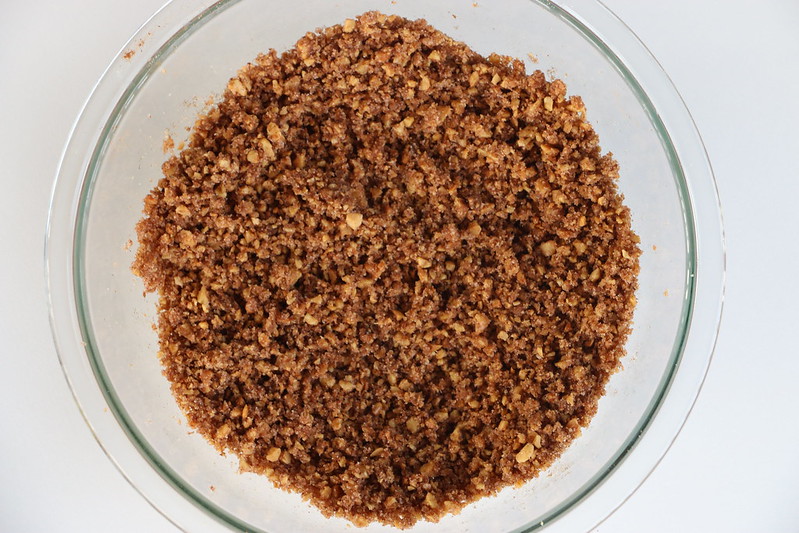
In a medium-sized bowl, mix the roasted walnuts, 1 cup sugar, 1/4 cup of melted ghee, cinnamon and 1 tablespoon orange blossom water. Set aside.


IMG_5251

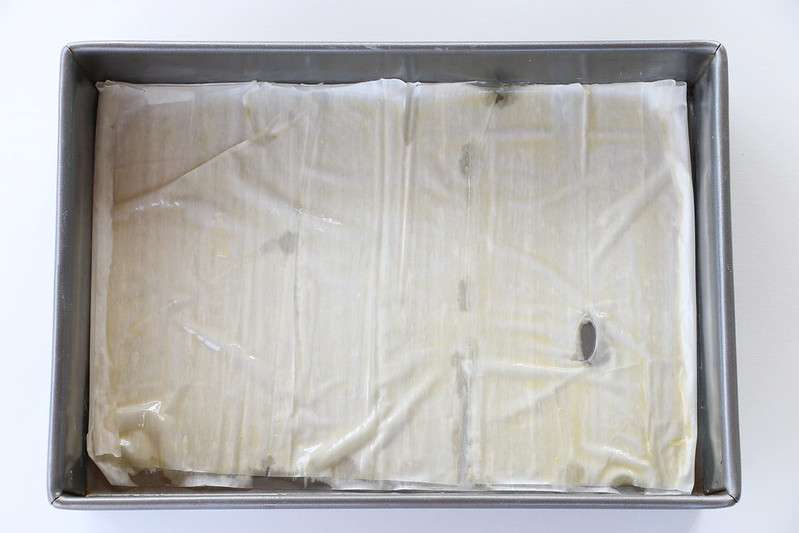
Grease a 9×13 inch baking pan. Place two sheets of phyllo dough in the pan. Brush with melted ghee.


IMG_5254
Repeat until half of the sheets in the box are used (one roll of pastry if using the same brand we did).


IMG_5255

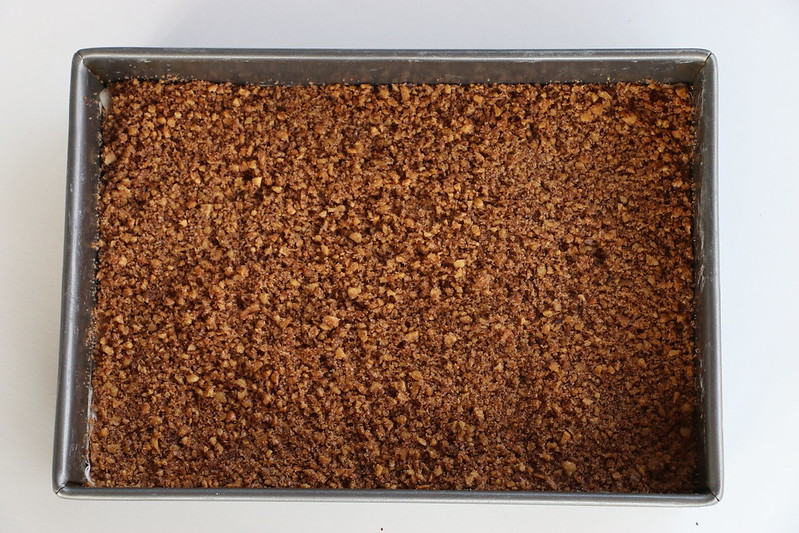
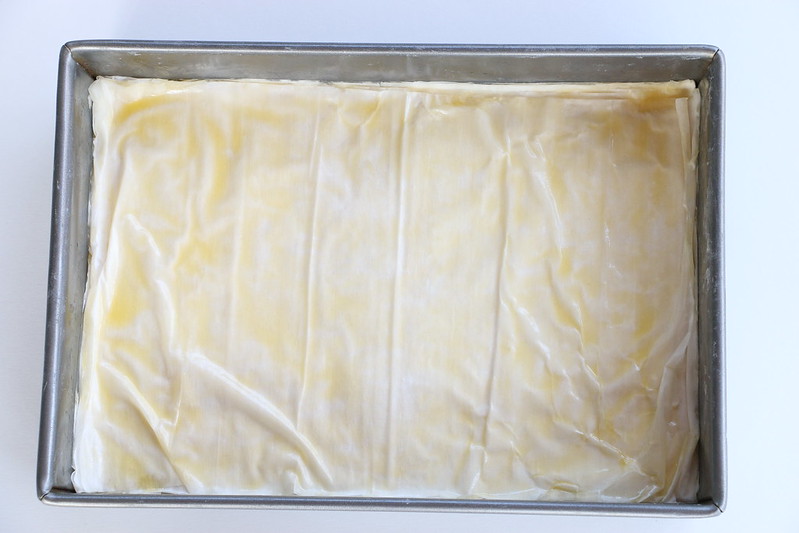
Then spread the walnut mixture that was prepared earlier on top.


IMG_5259

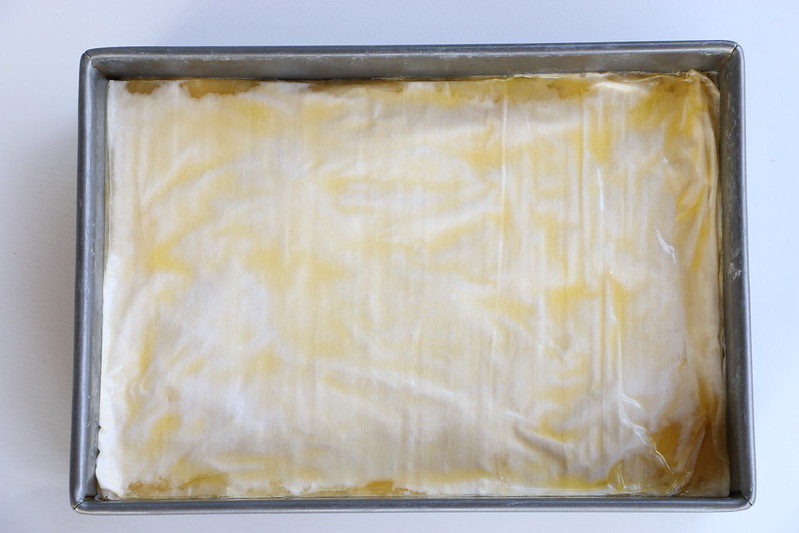
Continue adding two sheets of phyllo dough and then brushing with melted ghee until all sheets are used up.


IMG_5263

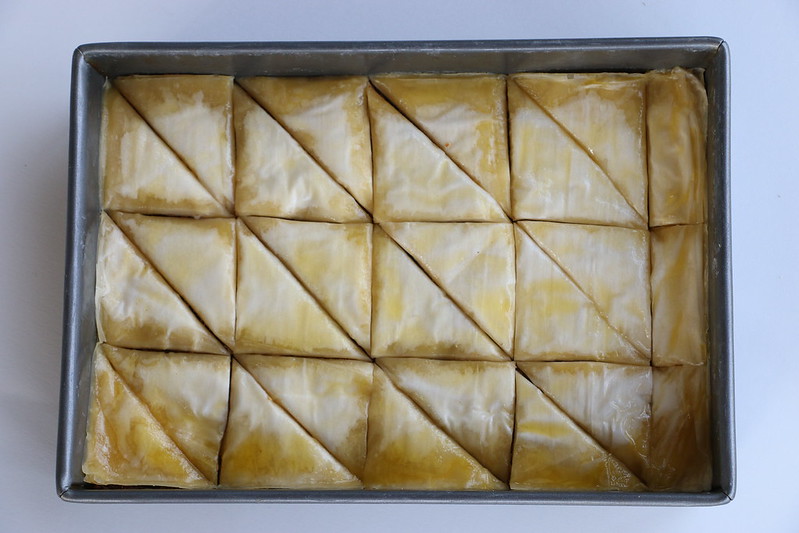
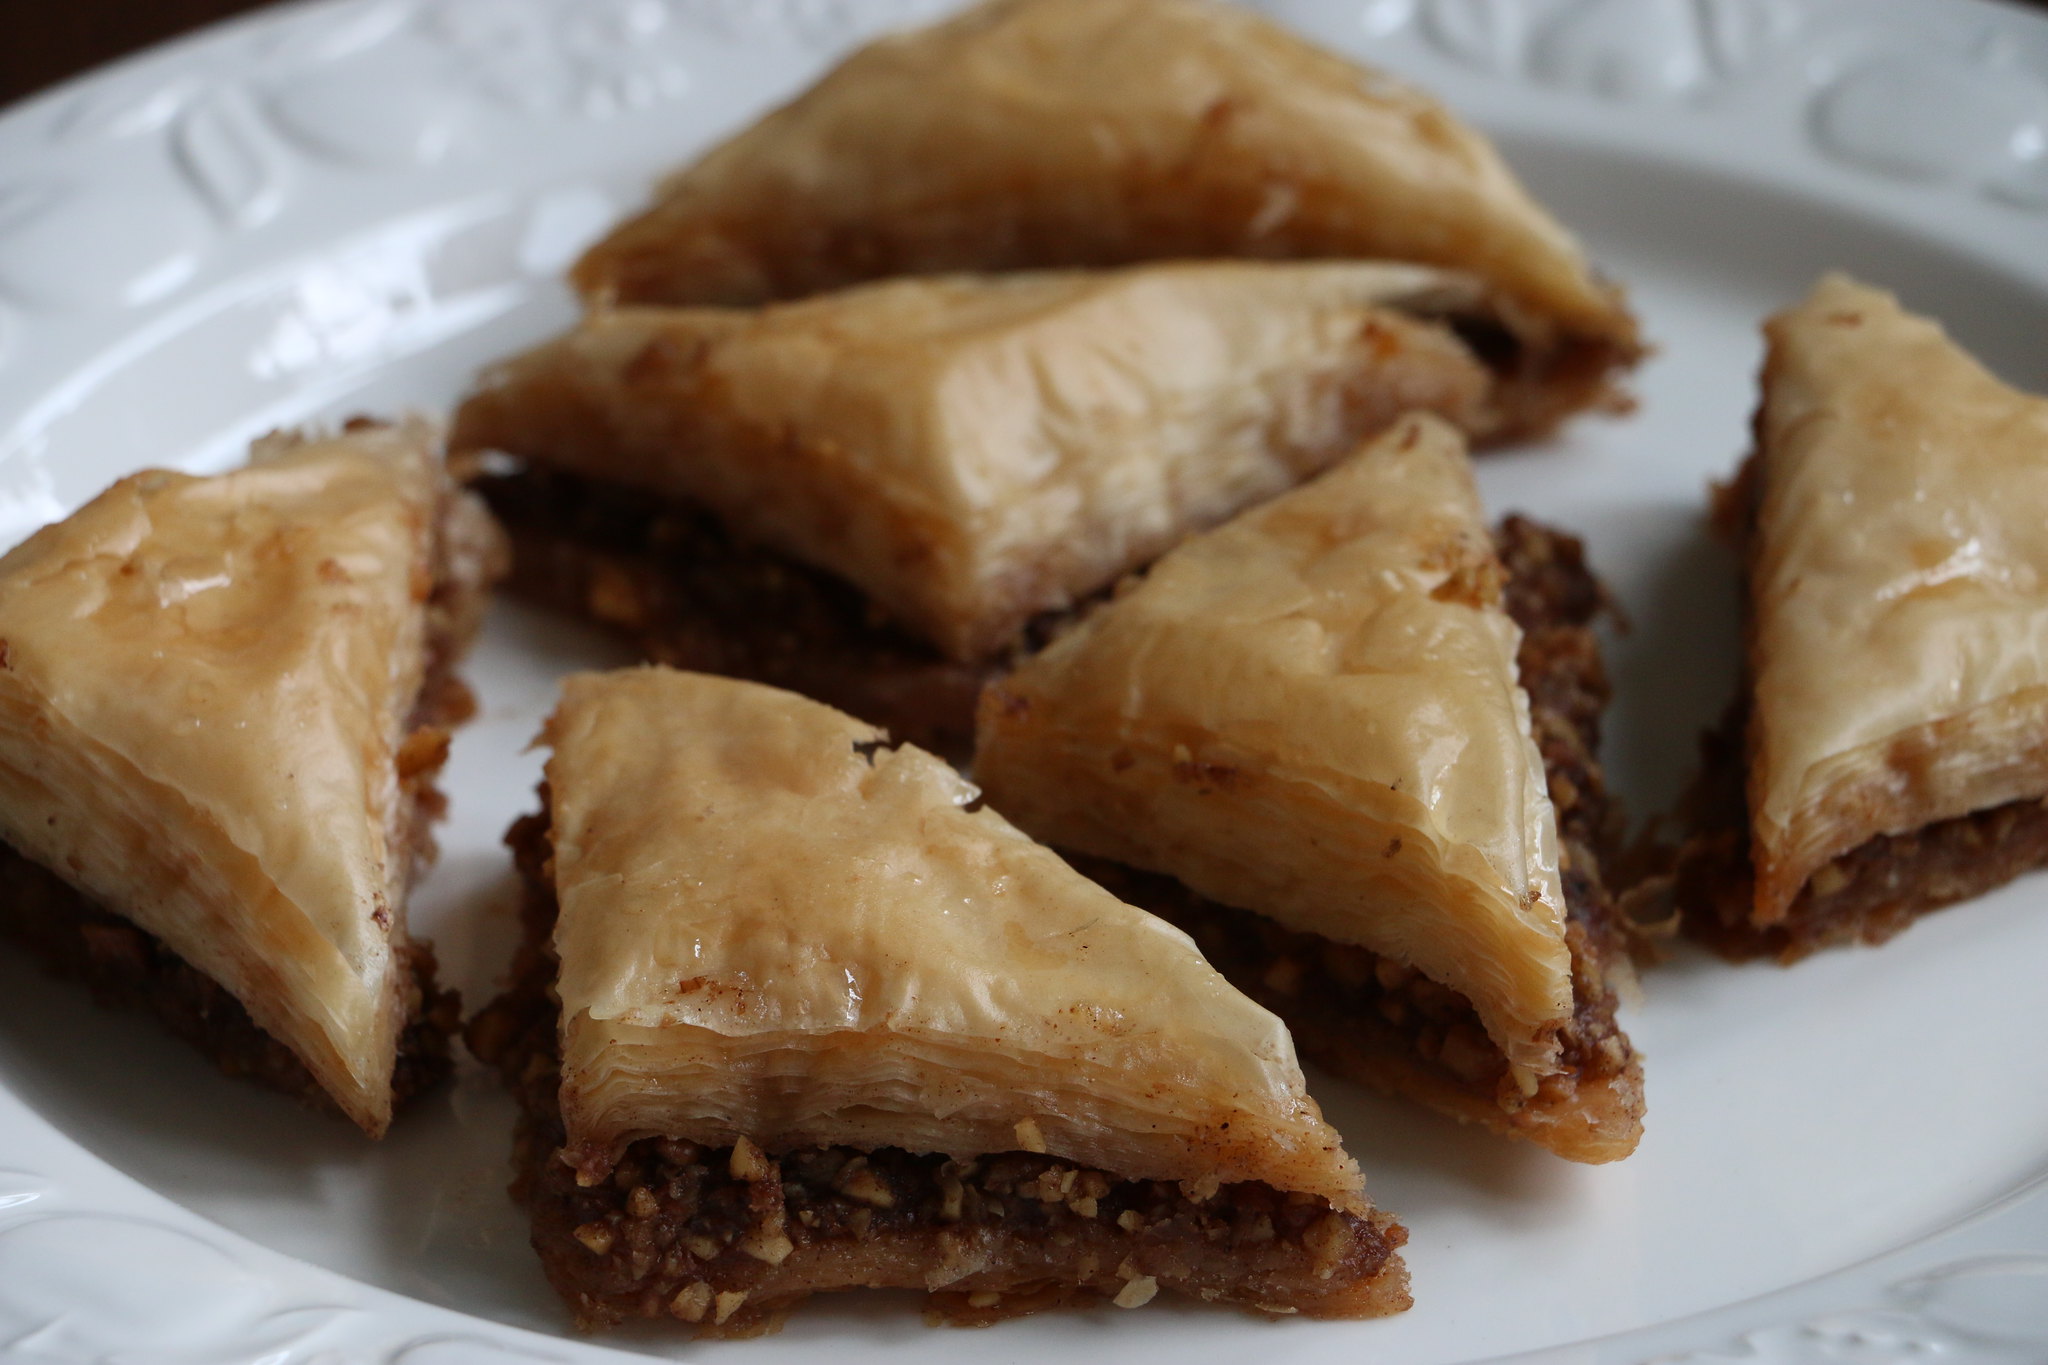
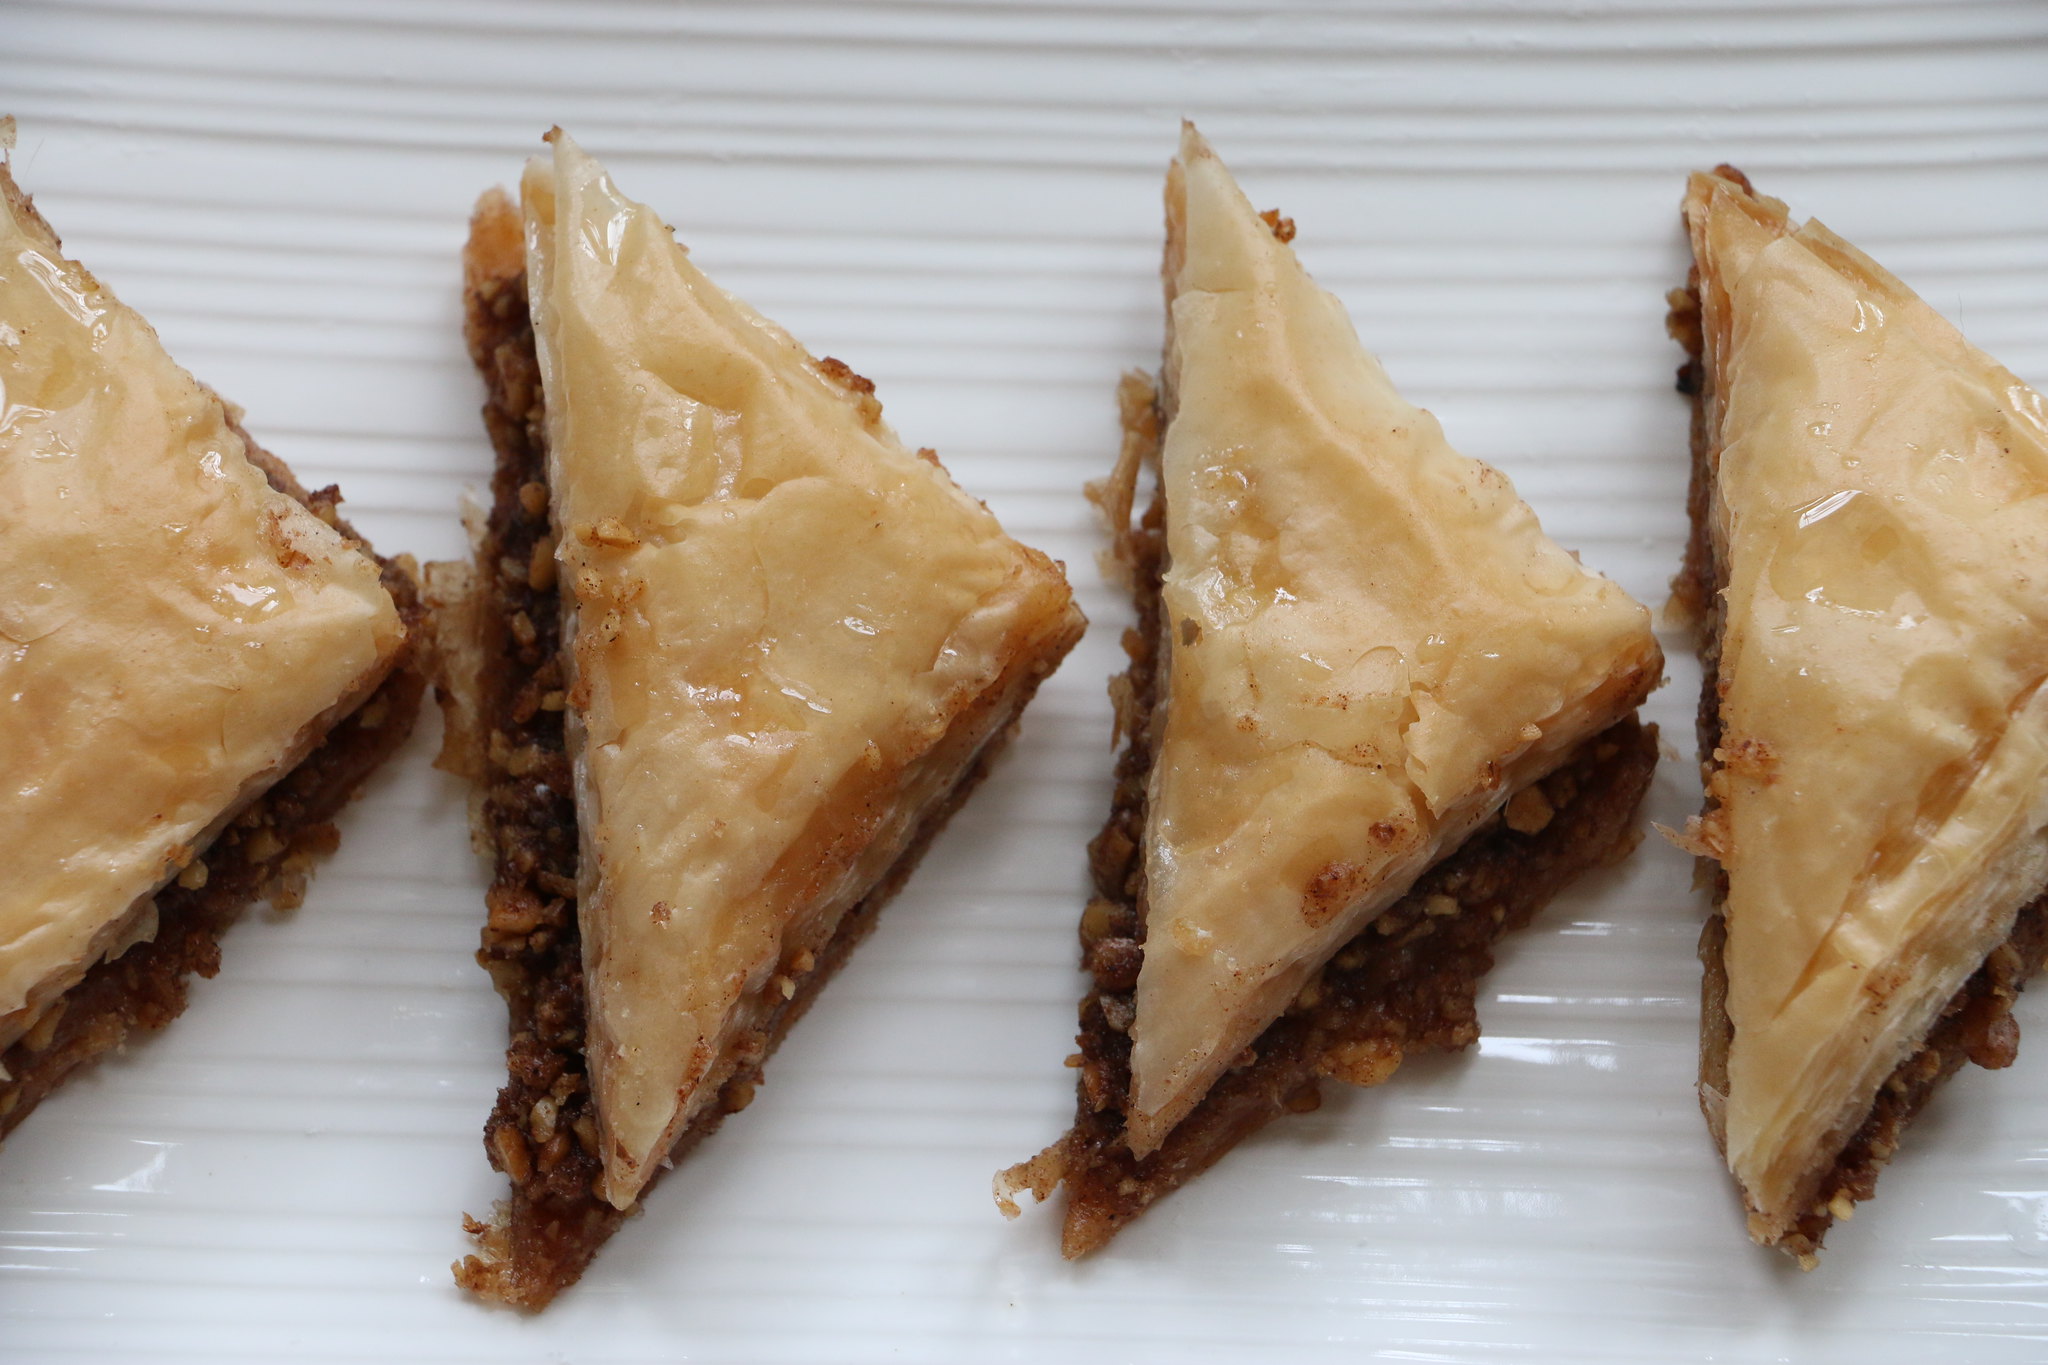
Cut baklava into rectangles, and then cut rectangles in half diagonally to form triangles.


Bake at 400˚F for 5 minutes. Then turn the heat down to 300˚F and bake for an additional 50 minutes or until golden brown.

While the baklava is baking, prepare the sugar syrup or sharbat.
In a medium-sized saucepan, combine the 2 cups sugar and 1 cup water. Heat over medium heat for 10 minutes or until it starts to boil. Take it off the heat and add the 2 tablespoons lemon juice. Return to the heat and cook until the sharbat boils again. Remove the sharbat from the heat and stir in the 2 tablespoons orange blossom water. Set aside to cool.

When the baklava is done baking, spoon the sharbat over it, making sure to get in between the cuts. Let the baklava cool. Then, using a sharp knife, go over the cuts. Then, remove the baklava from the pan, piece-by-piece. Enjoy!

Homemade Nutella (Chocolate Hazelnut Spread)

IMG_3752  IMG_3770 IMG_3778

IMG_3760

This homemade chocolate hazelnut spread is utterly delicious. It is creamy, chocolatey, and goes perfect with almost everything. While making this, I had to have some samples throughout…

Once you taste this Nutella, you will never go back to the store-bought version. This spread tastes like hazelnuts and chocolate. The store-bought Nutella tastes like sugar. Also, the homemade version has significantly less fat and sugar.

Also, there are real chocolate hazelnut spreads for sale like Justin’s Hazelnut Butter Blend. If you have had some of that, this homemade version tastes EXACTLY like that, but without the extra cost!

This recipe was found at Bruno Albouze: The Real Deal.


Makes: 1.2 pounds or 500 grams Nutella (size of one regular jar)


Ingredients:

3 tablespoons or 30 grams almonds

2/3 cup or 80 grams hazelnuts

2 1/2 ounces or 75 grams dark chocolate (60-70% cocoa)

2 1/2 ounces or 75 grams milk chocolate

3/4 cup milk

1/4 cup dried milk

1 tablespoon honey

1/4 teaspoon salt


Directions:

Preheat your oven to 350˚F. Line a baking sheet with foil and place the nuts in it. Then bake the nuts for 15 minutes.

Meanwhile, place the two types of chocolate in a microwave-safe bowl. Microwave in 30 second intervals, stirring in between, until melted. You can also melt the chocolate on top of a double boiler (a bowl on top of a saucepan with simmering water), just make sure the bowl doesn’t touch the water.

When the nuts are done roasting, put the warm nuts in a food processor. Blend until smooth and pasty. The nut butter will be quite thick (thicker than peanut butter). This will take a few minutes.

In a saucepan, mix the milk, dried milk, honey, and salt. Cook until the liquid comes to a boil. Then take the pan off the heat and stir in the melted chocolate.

Add the chocolate and milk mixture to the food processor with the nut butter. Pulse the mixture until smooth and combined.

Take a jar or other container, and pour the Nutella in. The spread will be runnier than the final product at this stage. Then refrigerate until firm (a couple of hours). Enjoy!


Mint Chocolate Cupcakes

IMG_3705  IMG_3651 IMG_3689 IMG_3718 IMG_3577 IMG_3581 IMG_3589 IMG_3596

These cupcakes are super moist and chocolatey, my new favorite. The light, creamy mint frosting pairs with it perfectly. These cupcakes look adorable with the piped rosettes and edged mini chocolate chips, and are a treat to eat. They were taken to a party and everyone enjoyed them.

This cupcake recipe can be used as a normal chocolate cupcake recipe (without the mint) and can also be doubled to make a layer cake.

This recipe is adapted from Lauren’s Latest and Our Best Bites.

Oven Temperature: 350˚F
Baking Time: 10-15 minutes
Makes: 12 cupcakes

Ingredients:
cupcakes
1 cup milk
1 teaspoon white vinegar
1/3 cup oil
3/4 cup granulated sugar
2 teaspoons vanilla
1 cup all purpose flour
1/3 cup cocoa powder
3/4 teaspoon baking soda
1/2 teaspoon baking powder
1/4 teaspoon salt
1/2 cup Andes baking chips (mint chocolate morsels)

frosting
3 tablespoons flour
1/2 cup milk
1/2 cup butter
1/2 cup granulated sugar
1 teaspoon mint extract
a couple drops green food coloring (optional)

garnish
1/2 cup mini chocolate chips

Directions:
cupcakes
Preheat your oven to 350˚F. Line one cupcake tin for 12 regular-sized cupcakes with paper liners.

In a small bowl or in your measuring cup, stir the milk and vinegar together and set aside for 5-10 minutes (if it looks curdled, that’s because it’s supposed to be).

In a large bowl (we used a stand mixer, but it is not necessary), mix together the oil, sugar and vanilla.

In a medium bowl, stir the flour, baking soda, baking powder and salt together. Also sift in the cocoa powder.

Then, alternate the milk and the flour mixture into the oil and sugar, starting and ending with the flour. Then stir in the Andes mints.

Scoop the batter into the cupcake liners (a large ice cream scoop is perfect for this). Then bake for 10-15 minutes or until a toothpick inserted in the center comes out with just a few moist crumbs. IMG_3617

Cool your cupcakes on a wire rack until completely cool.

frosting
In a small saucepan, stir the flour and milk constantly over medium-low heat. The mixture will start to thicken. When you can see the bottom of the pan when you stir, the mixture is thick enough. Take it off the heat and place in the refrigerator to cool.

Whip the butter and sugar together until light and fluffy. Then add the cooled milk-flour mixture and mint extract. Keep mixing until the mixture becomes very light and fluffy. This will take around 10 minutes, so don’t stop mixing if it doesn’t seem to come together. It is finished when you can rub some frosting between your fingers and you can’t feel any sugar grains. Mix in the food coloring and you are done.

assembly
Put your frosting in a piping bag fitted with a large star tip.

IMG_3668

Then, get out your cooled cupcakes. Pipe a rosette onto the tops of each cupcake.

IMG_3671

Turn the cupcake onto its side in your hand. Then sprinkle some mini chocolate chips onto the edges of the frosting.

Enjoy!

Chocolate Bread

IMG_0813 IMG_0820
IMG_0306 IMG_0307 IMG_0308 IMG_0309


These delicious breads with chocolate filled in the middle are so heavenly. Every bite is warm, chocolate goodness in your mouth. We like to reheat them for a super special breakfast – the perfect start to any morning.


This sweet bread dough is also super versatile and can be used for any sweet breads. We have done cinnamon rolls, red bean breads and more.


Oven Temperature: 375˚F

Baking Time: 15-20 minutes

Makes: 10 fairly large rolls (we share them between two people, but these are so delicious I could gobble the whole thing up)


Ingredients:


1 cup milk

1/3 cup granulated sugar

1/3 cup butter

1 tablespoon dry active yeast

4 cups flour

1/2 teaspoon salt

2 eggs

2 tablespoons vegetable oil

1 cup chocolate chips (you can use any chocolate; a large chocolate bar would also work)


Directions:

Combine the milk, sugar, butter and yeast. Let sit until frothy (~10 minutes).

In a large bowl, mix the flour and salt. Then pour in the milk mixture, eggs and oil. Mix until a ball is formed. Then knead until smooth and elastic. We like to use our stand mixer with a dough hook attachment to make the kneading process easier. You know the dough is done when you can see through the dough when stretched.

Grease your bowl with a little bit of oil and place the dough ball back in. Cover the bowl with plastic wrap. Rise it until double in a warm, draft-free spot. We like to put it in a 100˚F oven. This will take ~1 hour.

Preheat your oven to 375˚F. Prepare a baking sheet with foil, parchment or a silicon baking mat.

Then portion your dough into 10 pieces. Take each piece and roll out into a 4×6 rectangle. Place a portion of chocolate on one side of the dough. Then cut slits on the other side. (See above pictures for reference.) Then wrap the cut ends around the chocolate and press into the back of the bread. Place each shaped bread onto your prepared baking sheet.

Bake for 15-20 minutes or until the tops and bottoms are golden brown. Enjoy!

Red Velvet White Chocolate Chip Cookies

IMG_3158IMG_3144IMG_3147IMG_3142IMG_3149

These vibrant red and white dotted cookies are super delicious and pretty. We made these for Valentine’s day a while back… and forgot to post them! But, here they are. The taste is classic red velvet; not quite chocolatey enough to be chocolate and not entirely vanilla. The cookies are soft in the centers and slightly crisp on the edges, a perfect cookie by my definition.

Packaged in a clear treat bag, these cookies are the best Valentine’s day or any day gift. If you are wary about using the red food coloring, you can opt out or use less, but you just won’t get that stunning red color. Also, if you like your red velvet more chocolatey as these cookies are rather mild, then up the cocoa powder by a couple more tablespoons. This will also darken the bright red tone.

I found this recipe on CookingClassy.


Oven Temperature: 375˚F

Baking Time: 8-9 minutes

Makes: 24 cookies


Ingredients:

1 1/2 cups all-purpose flour

2 1/2 Tbsp cocoa powder

1 tsp cornstarch

3/4 tsp baking powder

1/4 tsp salt

1/2 cup butter, softened to room temperature

1 cup granulated sugar

1 large egg

1 tsp white vinegar

1 1/2 tsp vanilla extract

1 1/2 tsp red food coloring

3/4 cup white chocolate chips, divided in half (one half for the batter and the other for placing on top)


Directions:

Preheat your oven to 375˚F. Prepare your baking sheets with parchment paper, foil, or a silicone baking mat (finally got one and it is the best thing in our kitchen; we use it for everything! :))

In a medium-sized bowl, mix the flour, cocoa powder, cornstarch, baking powder, and salt.

In the bowl of your stand mixer, cream together the butter and sugar until light and fluffy. Then add the egg and mix until fully incorporated. Then mix in the vinegar, vanilla, and red food coloring.

IMG_3126

Now, mix in the dry ingredients a little at a time until combined. Then mix in 1/2 of the white chocolate chips.

IMG_3140

Scoop out your cookies (we like to use our handy dandy ice cream scoop) onto your prepared baking sheet. Roll each scoop into a ball and gently press in 5 white chocolate chips or so. It will feel like there are too many white chocolate chips for such a small cookie ball, but these cookies spread out nicely, so it all works!

Then bake for 8-9 minutes or until the bottoms are lightly browned. This can be hard to tell, so you can also look at the white chocolate chips and if they are just starting to brown, then the cookies will be ready!

Cool on a wire rack and enjoy!

Fluffy Banana Pancakes

IMG_3346 IMG_3342 IMG_3345 IMG_3337

Pancakes are the ultimate weekend breakfast. Fluffy, light, airy, delicious, doused in syrup; what’s not to love? This recipe is one of the best pancake recipes we have tried. It is the perfect alternative to the traditional pounds of banana bread usually made with those too-ripe-to-eat bananas sitting on the counter. One forkful of these yummylicious pancakes and you will be in love. The best part are that these pancakes are super simple; even simple enough to make on any morning.

Now get to making some pancakes!

I stumbled upon this recipe on kitchentreaty.com and I made a couple adjustments to fit my liking.


Makes: ~16 4-5” pancakes


Ingredients:

2 cups buttermilk (or 2 tablespoons vinegar + enough milk to equal 2 cups, and then let mixture sit for 5-10 minutes)

2-3 small or 1-2 large ripe bananas, or about 1 cup mashed (we don’t like to measure out the bananas, so guestimation is ok)

2 eggs

3 tablespoons oil

2 teaspoons vanilla extract

2½ cups all-purpose flour

¼ cup sugar

1 tablespoon baking powder

½ teaspoon baking soda

½ teaspoon salt

1 cup chocolate chips (semi-sweet, dark, mini, or whatever you like; we like to mix and match)


Directions:

In a medium sized bowl, whisk together the buttermilk (or vinegar + milk substitute), mashed bananas, eggs, oil, and vanilla.

In another larger bowl, mix the flour, sugar, baking powder, baking soda, and salt.

Then, make a well in the center of the flour mixture by making a hole in the middle of the flour mix. Then pour the wet mix into the hole. Whisk the batter together until there are no large pockets of flour. It is ok for the mix to be lumpy. Let the batter sit for 5-10 minutes to activate the baking powder.

Then lightly grease a pan with some oil and put on medium-high heat. When the pan is hot, lower heat and add in your pancake batter. You can use a ladle to pour in equal portions or use a large ice cream scoop. When the batter is still wet, sprinkle on some chocolate chips. The pancakes should start to form bubbles around the edges and in the center, and be golden brown. At that point, flip the pancakes over and cook for an additional minute or until the other side is golden brown. Repeat with the rest of the batter.

Serve up your pancakes plain (our favorite), covered with more chocolate (for that chocolate craving), with some sliced bananas, maple syrup, or whatever you fancy. Enjoy!